 简体中文
简体中文 Русский
 Español
Electric butterfly valve repair
Posted by Bundor valve
Electric butterfly valve maintenance is divided into three steps, disassembly, maintenance, assembly.The following Bundor valve for you in detail.
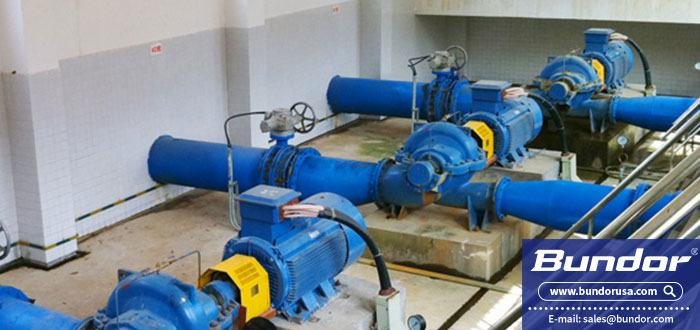
Step 1: Electric butterfly valve disintegrates
Mainly include: (1) handle good work ticket, confirm no water in the tube, no pressure, the valve in the full closed position, remove the power connector;(2) Remove the motor connection bolts and place them on the maintenance site;(3) Remove the connecting bolt of flange and pipe flange, lift out the valve body, pay attention not to break the valve disc;Remove the pan root gland and take out the packing;Remove the bottom bonnet and remove the washer and thrust bearing;Remove the fixed taper pin bolts of shaft and valve check, take out the valve shaft, take out the valve disc, and make a good flow direction mark;Remove the fixing seal ring bolt on the valve body, remove the seal ring.
Step 2: Repair the electric butterfly valve
Mainly include: (1) clean the valve shaft, valve sleeve, check the valve shaft bending, should be within 0.1mm, check the wear of the valve sleeve;(2) Check the sealing ring for scratches, sand holes, clean with water, do not contact with oil, to prevent rubber aging, if necessary, replace the new ring;(3) Replace packing, "O" ring;(4) Check the cleaning valve disc;(5) Check whether the transmission mechanism is flexible and check the wear of transmission gear;Change the lubricating oil;Measuring the size of the sealing ring, measuring the clearance between the valve shaft sleeve and the valve shaft, should be between 0.2-0.3mm;Apply lead oil to all the bolts.
Step 3: Assembly of electric butterfly valve
It mainly includes:
(1) On the valve body, install the sealing ring, with pressure plate, and bolt lock;
(2) Clean sealing surface, assemble valve disc, valve shaft, pay attention to the flow direction mark;
(3) Install upper and lower valve sleeve, washer and lower valve cover;
(4) Install upper and lower valve cover and new packing, press with the pan root gland and lock the upper valve cover bolt;
No sundries shall be left in the pipe and valve for cleaning;
Pay attention to the flow direction of the pipeline, put the valve in the full closed position, lift the valve on the pipeline, pay attention to lifting, do not touch the valve body, lock the bolt diagonally evenly;
7 on the transmission mechanism, after the assembly of the valve to do trial run, switch several times, check the flexibility.